Sheila Kennedy is a contributing editor to Putman Media's Plant Services and managing director at Additive Communications.
Similar to other process manufacturers, sawmills work around the clock to make quality products from raw materials with a minimum of waste. They want to maximize the capital invested in the factory, use it at full capacity and accommodate flexible manufacturing practices. In an ideal world, factories would operate in a mode where each machine center runs within its process capability, and the operators would know immediately when something drifts out of tolerance, so it could be corrected quickly.
Before sensors became part of process control, dimension monitoring was done by an operator who would bring a caliper to each machine center, pull and measure boards in multiple places, log the measurements on paper and repeat this process a few times per shift. In some cases, it would be necessary to lock out machine centers, possibly impacting production, in order to gain safe access to the measurement samples. Later, the measurements were taken back to an office where they were typed up, and dimension accuracy was analyzed. However, the sample size was too small to be effective, and the information arrived too late because the machine continued running in the meantime.
SEE ALSO: 3D Vision: Simpler, Smarter and Spreading
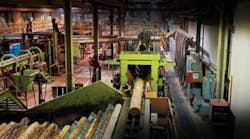
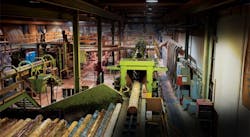
One of the sawmills owned by Canfor in Prince George, British Columbia, Canada, was determined to eliminate this problem (Figure 1). The mill's size checks used to occur once every two hours or so. If five boards were cut out of a log, the checkers might only measure the bottom two and overlook a problem in the third or fourth saw. "We used to waste a lot trying to find the source of problems," says Ray Wium, quality control supervisor at Canfor's Prince George sawmill.
In a sawmill, there are generally four to six breakdown stages as a log is cut into smaller pieces and planed. If the machinery is not set up correctly or isn't operating properly, for instance, if the cutting tools are wearing, then the company could end up with rail cars full of slightly undersized or oversized product.
Figure 1: Sawmills such as Canfor's can use 3D systems with scanners that continuously capture the height and width dimensions of logs and their location on the conveyor. If the machinery is not set up correctly or isn't operating properly, the company could end up with rail cars full of slightly undersized or oversized product.
Source: Canfor
The repercussions are far more costly if the problem is not discovered until after the product is packaged and shipped. If a customer in Japan rejects a shipment because the boards are too small, the company will need to dispose of them in that region, most likely selling them for pennies on the dollar. If they are too large, arrangements must be made to have them cut down to size.
"If you are doing 1.2 million board feet per shift as some mills do, you can't measure a lot of wood with a pair of calipers because you'd need an army of people," says Nick Barrett, president and technology development partner at system integrator SiCam Systems, Surrey, B.C. "We deal with thousandths of an inch of recovery in the sawmills, so if they mismanufacture by 0.01 of an inch when they cut a million board feet in a shift, that quickly adds up to many thousands if not millions of dollars over time."
Technology Revolution
Recent technology advancements are bringing this situation under control. "New three-dimensional machine vision systems allow process manufacturers to monitor and control their product dimensions automatically, whether that product is lumber, meat, tires, aluminum truck frames or loaves of bread," Barrett explains. "The systems use 3D sensors to conduct hands-free, real-time dimension monitoring of incoming, in-process and outgoing processes; perform process capability analytics; and generate alerts to the process control system when the process deviates from tolerance."
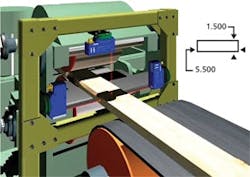
Barrett adds that 3D machine vision adds value beyond what you might initially conceive. "It improves quality by ensuring that the products are produced within specification limits. It allows problems to be solved quickly, which improves throughput and reduces waste (Figure 2). It increases profitability by maximizing the usage of raw materials and minimizing downtime. And it promotes safety by automating risky tasks and avoiding the need for tag-outs."
Many companies are familiar with two-dimensional machine vision, and some have tried to use this technology to solve three-dimensional problems, says Terrance Hermary, co-founder and CEO of British Columbia-based Hermary Opto Electronics. SiCam builds its measurement solutions based on the Hermary Opto scanner. "Two-dimensional measurements are flat, often black-and-white or grayscale, and are subject to variations in ambient lighting," Hermary explains. "On the other hand, sensors that measure in 3D are like a pair of eyes, adding depth and intelligence to the scan."
Figure 2: Canfor deals with thousandths of an inch of recovery in the sawmills, so if it mismanufactures by 0.01 of an inch when cutting a million board feet in a shift, that adds up to many thousands if not millions of dollars over time.
Source: Hermary Opto Electronics
Early Adopters
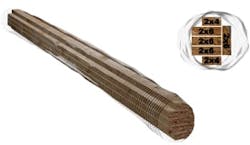
The wood industry has been an early adopter of 3D machine vision technology, Hermary says. Now, sawmills such as Canfor's can use 3D systems with scanners that continuously capture the height and width dimensions of logs and their location on the conveyor. The data is fed to a computerized optimization program that calculates how best to cut the lumber. For example, rotating the log to a certain position might enable a sawing pattern that generates more finished product out of the raw material (Figure 3). The optimizer or quality monitoring system's analytics use the scanner's information to spot problems in process, so refinements can be made quickly, usually without interrupting the process.
"Machine vision technology lets us do online measurement at high production and detect defects right away, so we can either stop production or drop those pieces out of the system. It's becoming critical technology for the wood industry because the benefits are massive," says Wium.
With this technology, there is no need to lock out the equipment or have operators enter potentially hazardous locations to make measurements. Single-point, 3D sensors measure the surface of every piece exiting the machine center, generating measurement data that is fed into statistical process control software in real time. The whole factory can report into one control station, and the slightest drift out of tolerance will immediately generate notifications, thereby reducing the feedback time to correct the condition.
"3D scanning heads let us see the shape of a log through data points and get accurate, real-time measurements for length, thickness and width," explains Wium. "There is far less waste because the system alerts you right away when your process goes off size. We trim less on our products because we get on size quicker when the equipment starts up. If we change a cylinder and don't put it back exactly right, it pinpoints the problem quicker," he adds.
Figure 3: Canfor's 3D systems capture image data that is fed to a computerized optimization program that calculates how best to cut the lumber.
Source: Hermary Opto
"Downtime is reduced because we have time to plan for maintenance when a process starts to go out of tolerance, so the work is completed more quickly and efficiently. Or we can do fatal stops in those areas where it is critical that we stop producing to prevent waste," says Wium.
Initial Benefits, Increasing Value
For many new users of 3D machine vision, Hermary says the full extent of the benefits is revealed over time in a process described as "a journey of discovery." Initially, the system helps to eliminate setup errors and resolve production concerns faster. With time, as confidence in the system grows, it can be used in more strategic ways to increase the amount of salable, dimensionally accurate product.
The first benefits come from error prevention. The 3D measuring and monitoring system reduces the risk of over- or undersized product by detecting such problems while the product is still on the production line, and it assures very short feedback from problem identification to human intervention. Multiple scans are taken at the same time, so fast that movement of the board up or down doesn't affect the thickness measurements. Operators and management will sleep better knowing that out-of-tolerance conditions will be detected and flagged immediately.
Next, target sizes can be reduced. Lumber is purposely oversized to allow for shrinkage and planing, but if it's too large, material is wasted. If a cut is made too thin for the cutting tool to surface cleanly, it causes skips that leave saw marks or rough surfaces to show up on the lumber. Mill operators also know they can get more 2 x 3-in. boards out of a piece of lumber than 2 x 4-in. boards. Strategically lowering the lumber target sizes at each stage of the breakdown increases the volume of product recovery as well as mill revenue.
"As mill operators develop a comfort level with the 3D machine vision system, they can reduce the target sizes through continuous, in-process dimension monitoring and quality control," says Barrett. "Reducing a target size by 0.010 in. at a sawmill could add $200,000 to the bottom line at year end at some mills. If the target size is reduced by 0.050-in. to 0.060 in., it could add more than $1 million."
A third phase of benefits comes when a mill can tighten mechanical tolerances. For example, saw kerf is the slot that a blade cuts into the wood, and its size is generally determined by the width of the blade. The expended material is sawdust, which is a very low-value product. Minimizing this loss of wood lowers sawmill costs.
Continuous Improvements
If a band saw starts to wiggle, the cuts in the wood are not square. When the band saw hits a knot in a log, the difference in fiber density may push the saw slightly off kilter. The 3D sensor can inspect and measure the position of the blade, and when it deviates or drifts, produce feedback to the PLC that automatically slows down the saw's feed rate as it chews through the harder material.
Chipping heads form round logs into four-sided cants, which are later cut into boards. High dimensional accuracy is needed to change the chipping head settings and positions in order to produce cants from logs in a single pass. The 3D machine vision system provides this capability.
"There could be 0.060 ins. of tool wear over an eight-hour shift — a fact that is generally unknown unless a 3D measuring system is used," Barrett says. "With this knowledge, a mill might decide to increase how frequently the cutting tools are changed from once every eight hours to once every four hours, reducing the variance in target size from 0.060 to 0.030, and generating considerable savings."
In the mid 1990s, Hermary Opto built electric boards for SiCam for different technology, not size control, according to Barrett. "We've known them for a long time. A big part of our relationship started in about 2002 when they released single-point sensors that we used to replace an older scanner."
Barrett says SiCam always tries to separate itself from competitors. "We'll spend a couple extra dollars to get the best and get the support that goes along with it," he explains. "I remember the days before we were using HO heads as kind of a nightmare because I spent half my time diagnosing hardware issues, system failures or crashes. So we stick with them because of reliability.
"In the lumber industry, Hermary Opto heads are a premium scanner because they are reliable. We recently received back one of the earliest heads we ever sent out, and it actually still works, and that just blew us away."
Wium adds that, "3D machine vision is good for any industry where there's a continuous production line and size matters."
Sponsored Recommendations

Leaders relevant to this article:
