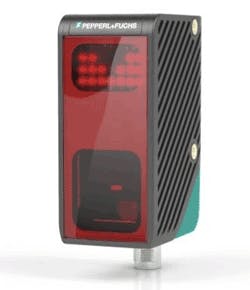
Pepperl+Fuchs' SmartRunner technology makes the functionality of vision systems available in easy-to-use digital-output sensors. Based on a combination of light section technology and 2-D vision, SmartRunner from Pepperl+Fuchs is a family of high-precision sensors tailored to the needs of specific applications. These sensors transform complex profile data into easy-to-process digital signals, making integration into the overall process simple.
The SmartRunner Matcher from Pepperl+Fuchs is a compact, camera-based light section sensor that combines both the evaluation process and the interfaces in one device. The device features a specially preconfigured firmware that enables it to specialize in extremely precise profile comparisons. The user simply has to input the required reference profile using the teach-in mode. After initial setup and configuration-the user simply inputs the required reference profile using the teach-in mode-the Matcher captures an image of each object's line profile. Using LEDs and a 2D camera, the SmartRunner Matcher compares the current profile to the taught-in reference profile. When the scanned profile matches the reference profile, the Matcher sends a "good" signal. When the profile deviates from the reference, a "bad" signal is sent.
SmartRunner technology does not depend on object contrasts. A 2-D vision sensor requires significant object contrasts for it to perform a viable evaluation. In comparison, the Matcher sees succinct shapes and edges, as the projection of a sharply defined laser-line enables clear and unique evaluations. This makes the system noticeably less sensitive to disruptive extraneous light, reflections, and the influence of various object colors and surfaces. As a result, the SmartRunner Matcher light section sensor can cover a wide range of applications.
In addition to the Matcher, Pepperl+Fuchs also introduces the SmartRunner Detector. This light section sensor is optimized for high-precision monitoring. The focus of the detector is on protecting expensive components and increasing machine availability. It detects the smallest unauthorized parts, overlapping, and overhangs. The detector reliably identifies objects with a minimum size of 0.25 mm in a trapeze-shaped measuring range with a width of 350 mm at a maximum range of 700 mm.
The integrated camera also makes it possible to record images in order to document the complete process and assure top quality control. The recorded error images can be uploaded remotely, preventing trips to the factory floor and allowing easy monitoring of difficult-to-access machine areas. The high-performance LEDs supply brightly-lit images. Parameterization through Data Matrix control codes is also possible.

