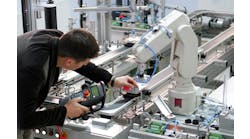
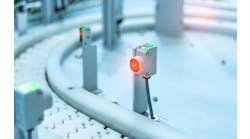
Presence sensing is a term used to describe the process by which a specific device is used to discover the measurement or the presence or absence of an object.
In manufacturing, we need to be able to perform operations to an object in the flow of our work processes. Before we can perform these operations, we must ensure that the object is in place first, and we need to know what that specific location is. We may even need to know the size of the part, as well.
Also read: How to choose the right presence sensor
This is where we would engage with a device that can recognize that the object is in place and that can ascertain the part size automatically. Often, the device used is a part probe capable of many functions including measurement and location.
Perhaps we are setting up a machining job where the parts need to be consistently machined to be within specification, but we know that we cannot rely on the parts to be the same width and length from part to part. We need to be able to find and account for the variation in the part in an automated fashion so we can meet the production requirements for this order.
Even though the part will be in a fixture or work holding setup, we will need to find the existing centerline of the part so that our features are centrally located. This creates a challenge when the edges vary as much as +/-.125 inch per part. In the worst-case scenario then, from the shortest part to the longest part we can have as much as .250 inch of deviation overall. This would be impossible to account for in an automated process if it weren’t for a presence-sensing device such as a part probe.
Recently, this very challenge was taken on by one of our customers who produces thousands of metal-plate products each year. Their normal process, which can include a production style oxy-acetylene torch or plasma cutter, is to cut out the shapes of the parts for their customers’ needs. These plates can be from thin sheet metal to as thick as 8.00 inches.
Depending on the specific geometry and thickness of the material, the perpendicularity of the edge can vary widely, and the length and width of the part can vary as much as +/- .125 inch from part to part.
One product they make routinely needs to have additional machined features that can only be made on a milling machine. These features must be machined consistent from the center of the part in both the x and y axes within tolerance while accounting for the large variations of the length and width of the parts. Additionally, the parts will be run on the off shifts by less skilled operators and still need to be able to meet the quality standards.
This means that the part must be easily loaded onto the fixture and securely held in place and then be measured for location and the size variation accounted for before the milling operation can take place. This is where an automated process using a part probe comes into play.
When the operator has set up the part and presses the cycle start, the machine is programmed to bring the part probe to the reference position of the part and begin the measuring routine. The measurement routine has ample allowance for the part deviation plus the total amount of movement needed to measure the part.
Since we are working out of the center in both the x and the y of the part, the routine takes the measured length and width and divides them in half and enters this new value into the work coordinates of the control. The remainder of the program, which produces the machined features will then run as normal from the newly established work offset.
Because the process of probing the part is automated, the need for a highly skilled operator to qualify each part is eliminated in the production run. This gives the flexibility to run the machining center on the off shifts with lower skilled operators.
Additionally, if the part is loaded incorrectly, the macro that runs the probing routine will sense a mishit and fail the routine. This will cause the machining program to error out and stop the automatic operation until the issue is resolved by the operator or lead person.
It has been our experience that part probing in the machining world opens so many more opportunities than other methods that were once utilized. The use of a probe for part measuring or position indicating can result in a large increase in throughput because of the time savings and part quality that inevitably follows.
Andy Watkins is direct sales manager at Romi Machine Tools in Erlanger, Kentucky. Contact him at [email protected].


